MAX2 School Bus Houdini Vest


Product Details
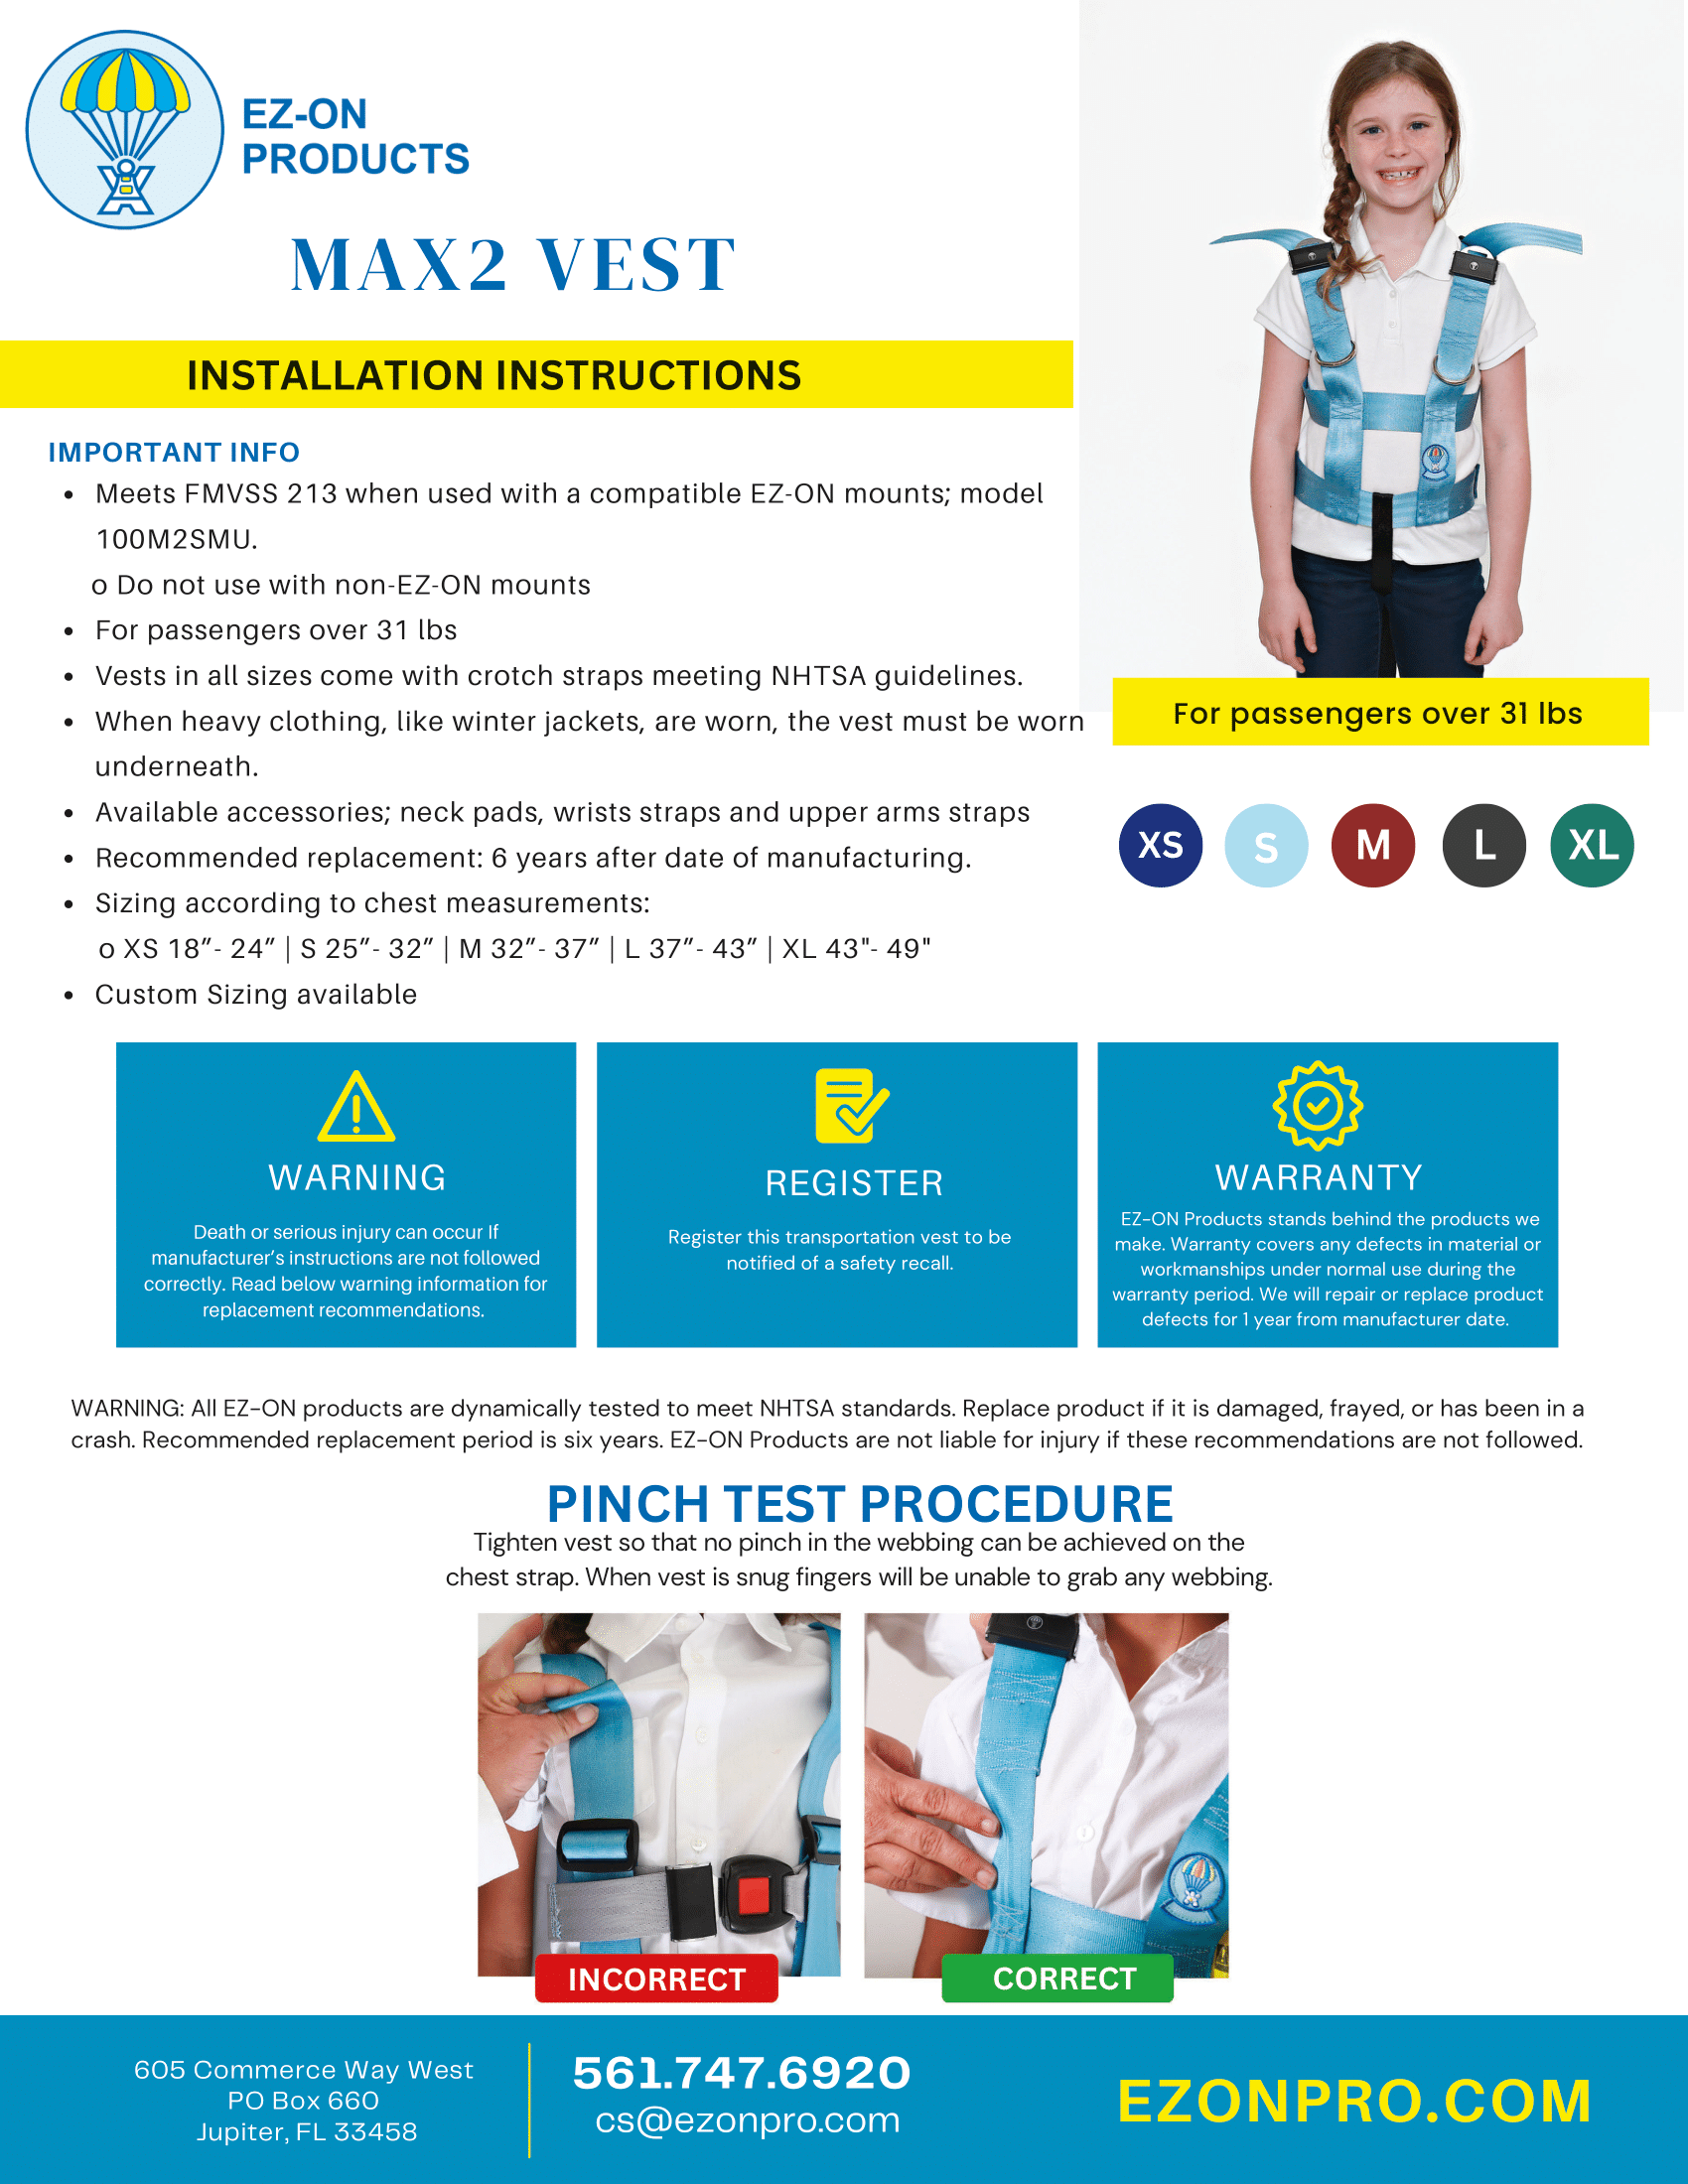
The MAX2 Vest is the most secure choice for use on school buses. The vest has many features to ensure the safety and security of the wearer and prevent unintended removal. This is typically recommended for “Houdinis” who have a tendency to try to remove their safety gear. The MAX2 is a great option for anyone looking for a safe, secure way to transport a wide variety of children.
- Meets FMVSS213
- Must be used with EZ-ON Compatible mounts; 100M2SMU
- For passengers over 31lbs, see vehicle mount product details for more information
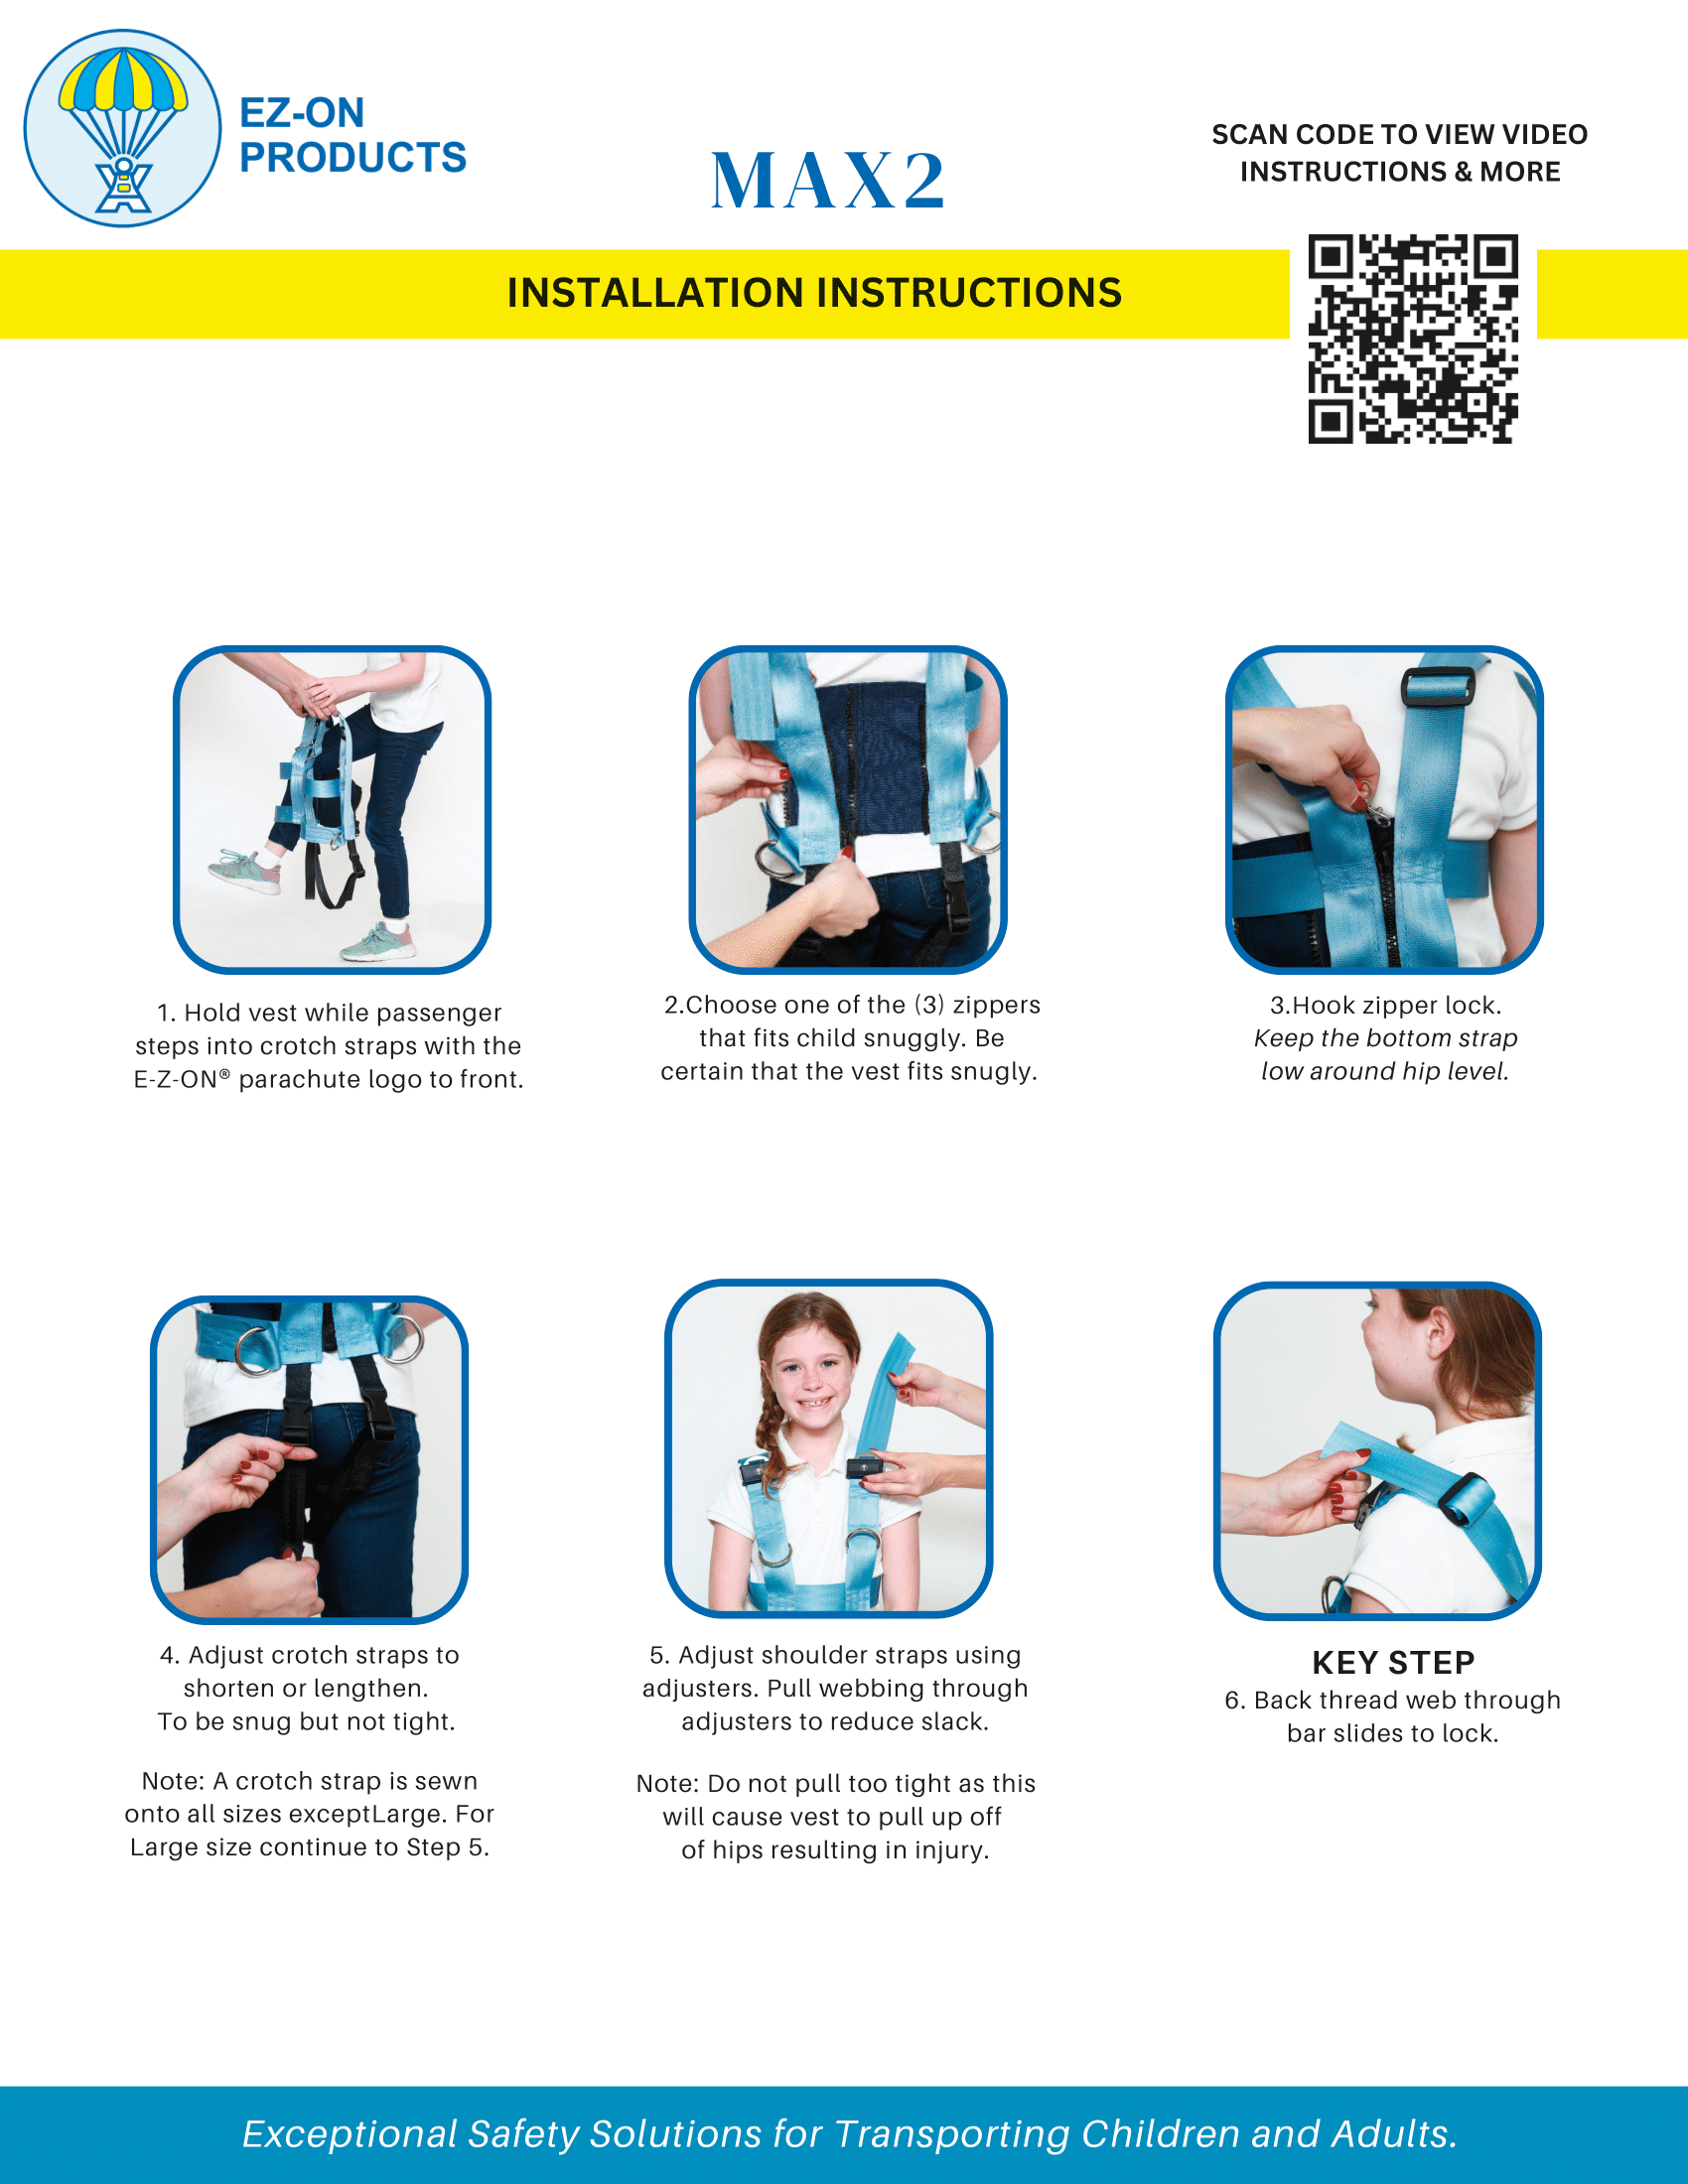
- All vest sizes come with crotch straps meeting NHTSA guidelines
- When heavy clothing, like winter jackets, are worn, the vest must be worn underneath
- Available accessories; neck pads, wrists straps and upper arms straps
- Recommended replacement 6 years after date of manufacturing
Contact a dealer to make your purchase

Washing Instructions
Cold water only. Hand or Machine wash on delicate cycle. Use a mild detergent such as woolite. Do not Machine Dry. IMPORTANT: DO NOT USE BLEACH OR DRY-CLEANING PRODUCTS.
Warranty
EZ-ON Products Stands behind the products we make. Warranty covers any defects in material or workmanships under normal use during the warranty period. We will repair or replace product defects for 1 year from manufacturer date.
Warning
Death or serious injury can occur if manufacturer’s instructions are not followed correctly. All EZ-ON Products are dynamically tested to meet NHTSA standards. Please follow washing instructions on product tag. Replace product if it is damaged, frayed or has been in a crash. Recommended replacement after six years. EZ-ON Products are not liable for injury if these recommendations are not followed.
- 100WR – Wrist straps
- 100UA – Upper arm straps
- 100AR – Ankle straps